Controlling Lights With My Pebble Smartwatch
A while ago, I wanted to automate the lights in my house. There were several guides for controlling cheap radio outlets with a Raspberry Pi and webapp. I ordered the parts and set it up over a weekend, but using a webapp to turn lights on and off was cumbersome if I wasn’t already sitting at my computer.
I had recently picked up a Pebble 2, so I took it a step further and wrote an Android App and Pebble App to control the lights from my phone and my watch.
This post will be one part show and tell, one part tutorial. Please do keep in mind that my code for this project was written primarily for me, so it isn’t configurable without modifying the source. You’ll need to be comfortable with compiling Go, modifying an Android App, setting up the Pebble SDK and modifying a Pebble App to get this working.
Getting The Parts
For this to work, we’re going to need a few things.
- Etekcity (or similar) 433 Mhz outlets
- A 433 Mhz transmitter and receiver. Pretty much any generic one will work. I’ve read a few people recommending getting a set of them in case one or two are defective.
- A raspberry pi. I’m using the original Raspberry Pi B+, but anything with compatible GPIO and networking should work fine.
- Some patch cables. I used these.
- An Android Phone
- A pebble smartwatch, I’ve got a Pebble 2 but everything should work on pretty much any Pebble.
Some optional things that may will make the project easier.
- Soldering tools - while you can just take some wire and wrap it around the transmitter antenna connection, soldering it in place is a much more robust solution.
- A GPIO breakout breadboard - this will make connecting the wires much simpler but you don’t absolutely need it.
Software you’ll need, all of it is open source!
- WiringPi
- Tim Leland’s RFoutlet code
- RestAPI and Webapp to control the lights. Note, you’ll need to modify the source with your own light codes and names.
- LightingControl Android App, You’ll also want to modify the names of the lights as well as the IP address or domain for your Pi
- Gadgetbridge Fork, you can build this from source or download my precompiled version.
- Pebble App, you’ll also want to modify this with the names of your lights and the order you want them to appear.
Setting Up The 433 Mhz Outlets
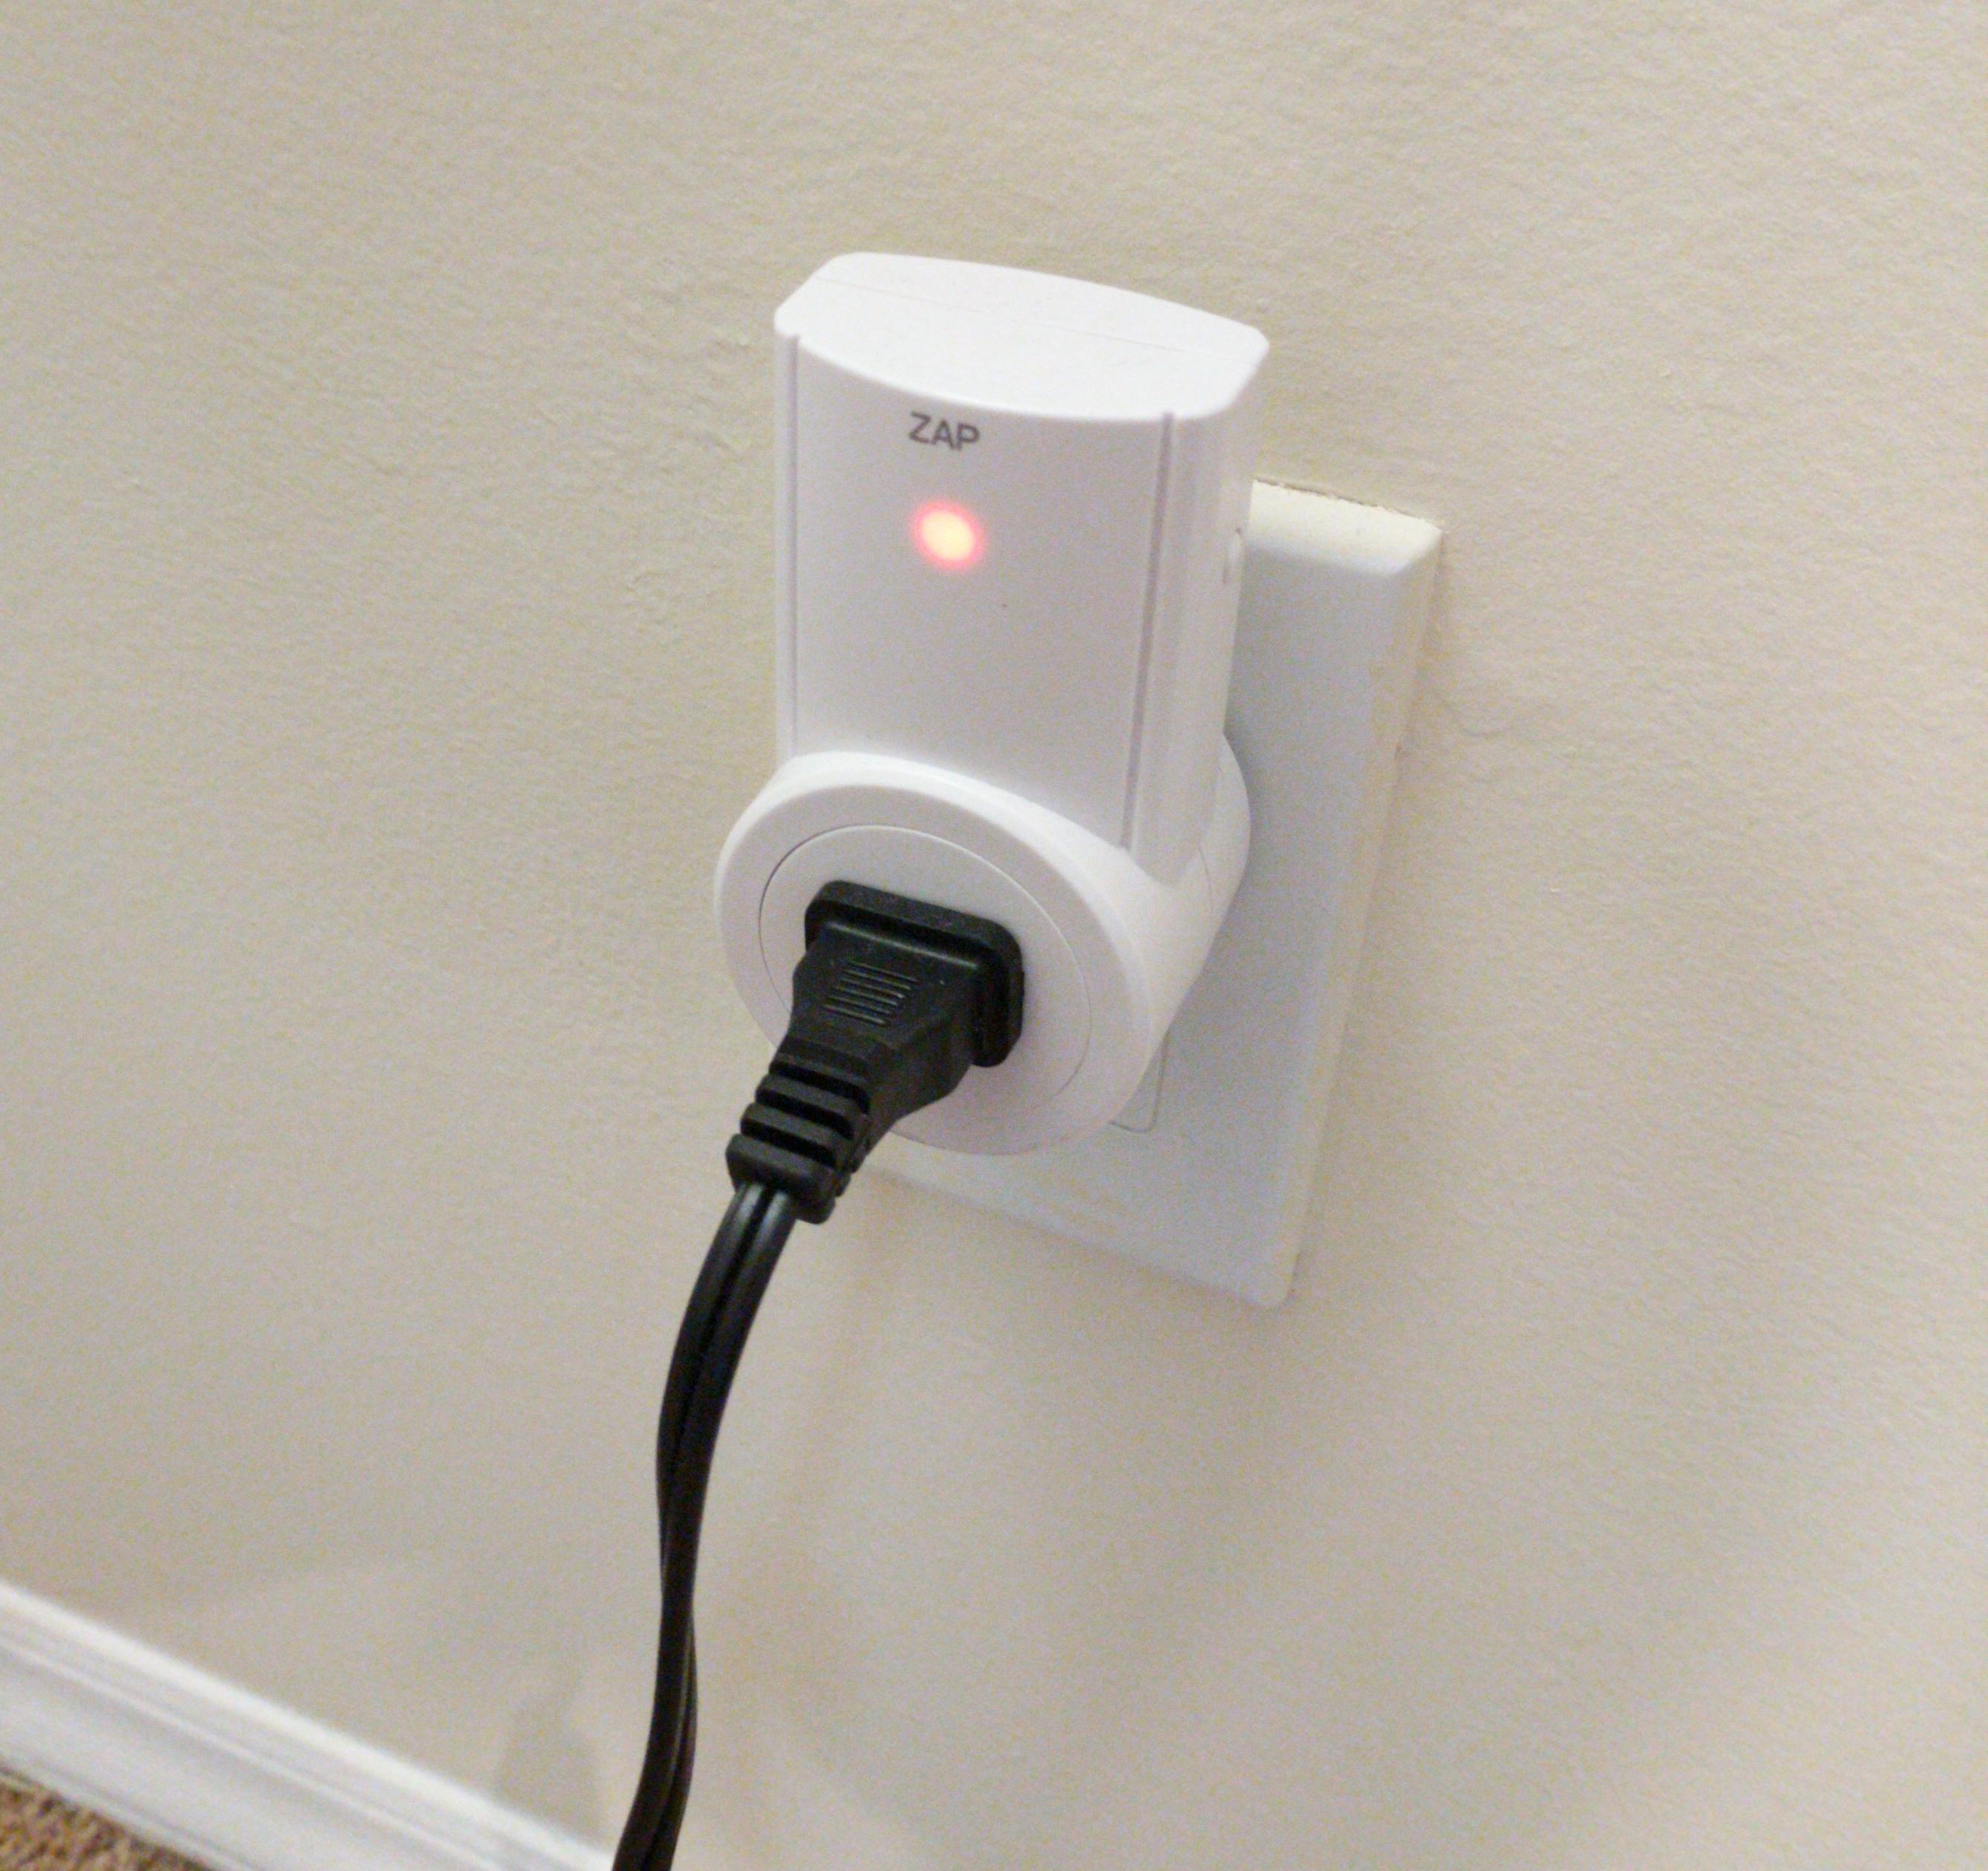
An RF outlet
Your outlets should come with a remote or set of remotes. They may also have the ability to program which buttons control which lights. I recommend verifying that the outlets and remotes work before continuing.
Setting Up the Raspberry Pi and Capturing the Remote Codes
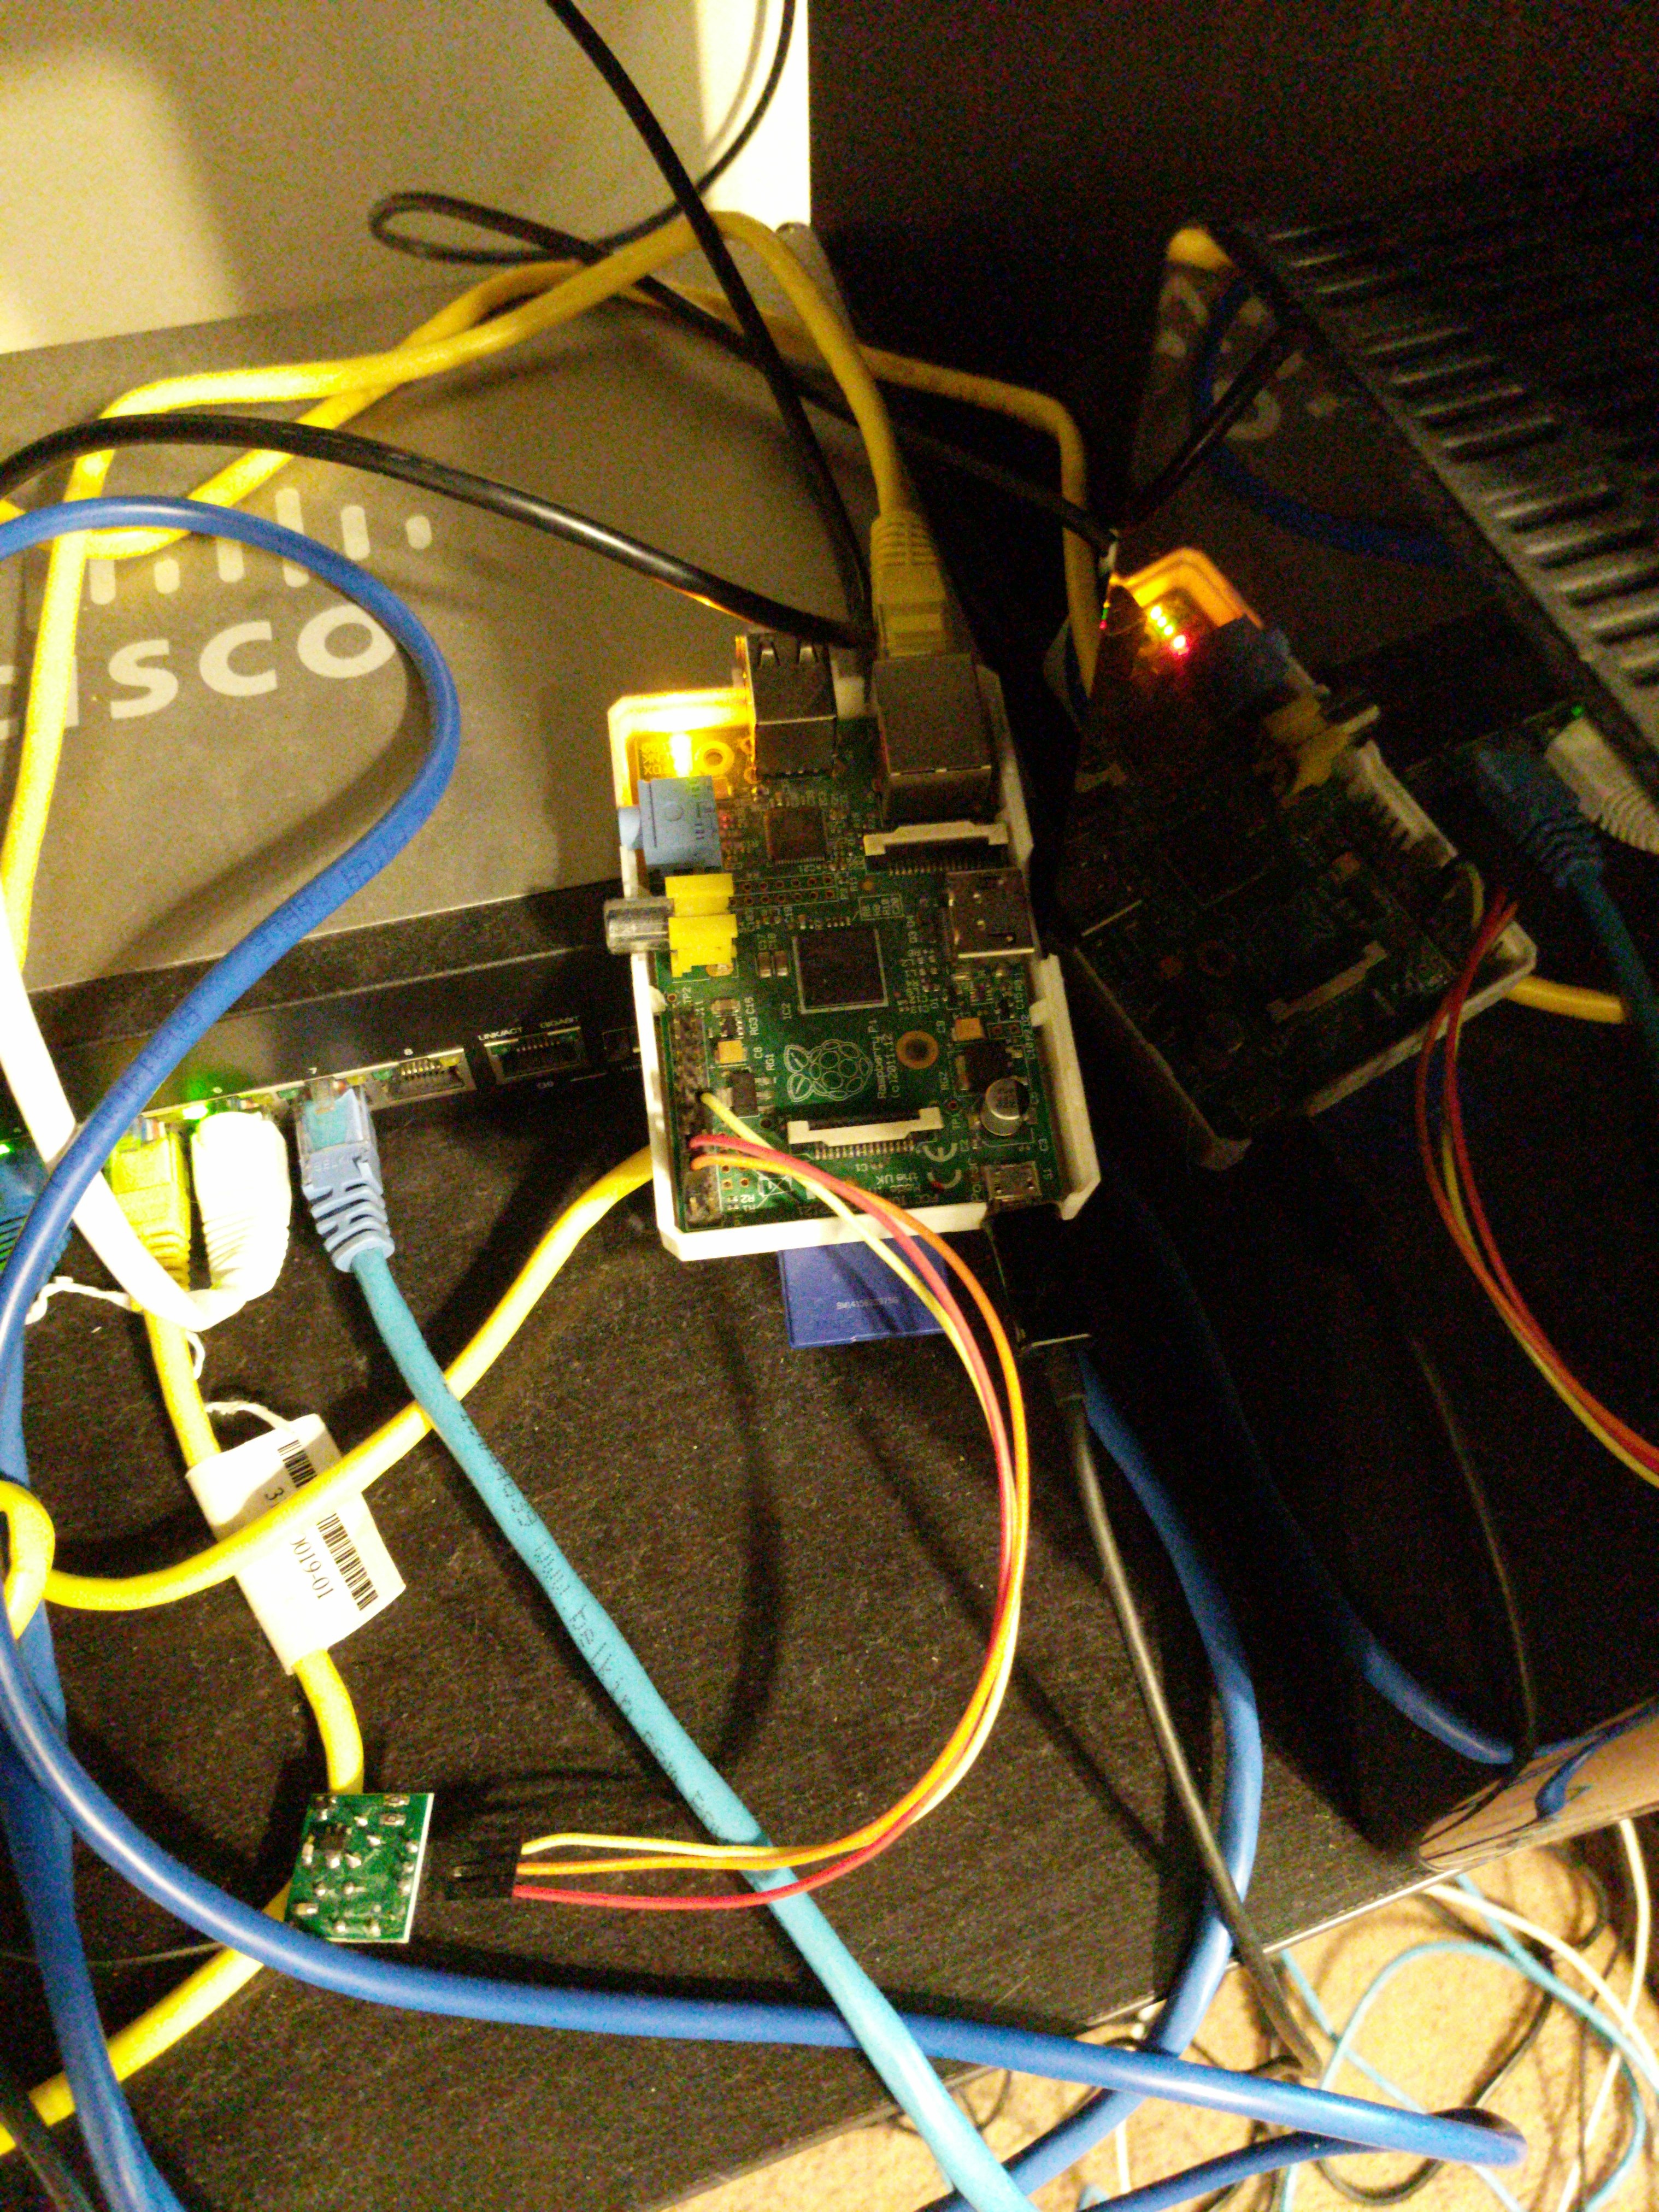
My raspberry Pi setup
For this part, I’m pretty much following Tim Leland’s guide. I highly recommend checking out the original guide here. Everything should be the same except the php portion.
You’re going to want to get the Raspberry Pi up and running with some flavor of Linux. Next you’ll need to install WiringPi by following this guide.
Clone the code git clone https://github.com/timleland/rfoutlet.git onto your Raspberry Pi
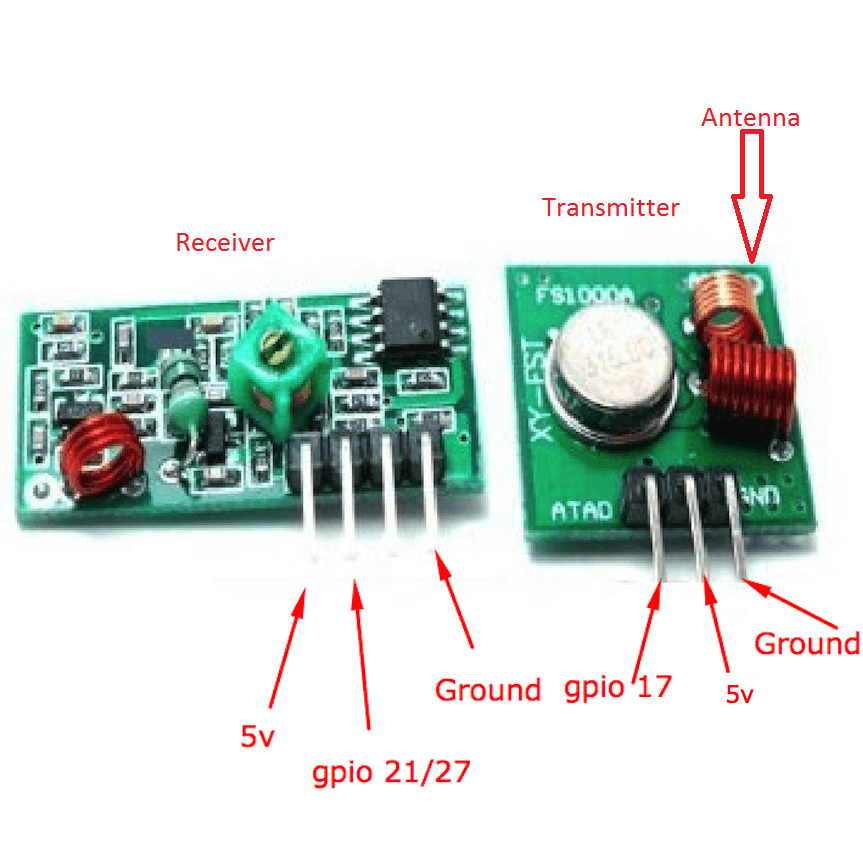
Transmitter and Receiver GPIO Configuration
Connect the 433 Mhz receiver to the Pi so we can capture the codes sent by the remote. Holding the receiver with the components facing you, connect the left most pin to any of the 5v pins on the Pi. Then connect the second from the left pin to GPIO pin 21 or 27. The GPIO layout will be different depending on which model of Pi you use. Finally, connect the right most pin to a ground pin on the Pi. You should now be ready to record your 433 Mhz codes.
From the directory you installed the utilities, run RFSniffer.
sudo ./RFSniffer
Now, with your remote. Press each of the buttons and record the codes and pulse lengths that are printed by RFSniffer. Keep track of which codes map to which buttons.
Once you’ve got all the codes recorded, you can disconnect the receiver since you won’t be needing it anymore.
Next, connect the transmitter. For this we’ll need an antenna. I’m using about a 4 inch piece of jumper wire that I cut and just attached to the antenna spot on the transmitter by bending the wire around it. I did this because I didn’t have soldering tools at the time. If you have soldering tools, you should definitely solder the antenna down. Next, with the components facing you, plug the left most pin into GPIO 17, plug the center pin into a 5v GPIO pin, and plug the right most pin into ground.
Plug in one of your outlets and attempt to send the ON code for it.
./codesend YOUR_CODE
If all goes well, your light should turn on!
If all doesn’t go well, double check that your pins and antenna wire are connected correctly. If that doesn’t work you may have to specify a different pulse length on the codesend command with -l.
Creating the REST API
At this point, I created a pretty simple REST API in Go that just calls the codesend binary using os/exec. It’s not ideal, and I should probably be using WiringPi directly, but it works! I like using Golang for projects like this because it’s so easy to cross compile. You just have to set the $GOARCH environment variable and run go build. This means I can compile the code on my desktop instead of on a slow Pi processor.
I also created a simple web frontend that just makes REST calls to the API. It uses the Material Design Lite UI kit. It gives the webapp a nice consistent look compared to the Android app.
You can clone or download the project from https://github.com/ianmcxa/lights. This includes the server code, the pebble app and a tiny CLI.
Next in main.go you’ll want to modify the codes array with your codes. You will also want to modify the sendCode function to point to the location where you installed the codesend binary. I have mine in /home/pi/rfoutlet.
The API itself is pretty simple. The / route returns the contents of app.html which we’ll get to in a minute, and the /update route takes a POST request with a JSON message. The JSON message is an object with the fields light and state. State is 0 for off and 1 for on. Light is the index into the array of light codes.
To compile the app set your GOARCH environment variable to arm or arm64 depending on which version of the Pi you’re using. Then, run go build.
Next, you’ll probably want to change the names of the lights in the app.html file. Note that the Golang code serves the app.html from the directory in which it is running, so you can modify the html without having to recompile the API.
Once you’ve got it the way you want it, copy the lights file and app.html file to your Pi. Then run the lights file. Navigate to http://YOUR_PI_IP_ADDRESS:8080/ You should see the webui. Try turning on and off the outlets. Note that you may need to run the file as root depending on the permissions.
Building the Android App
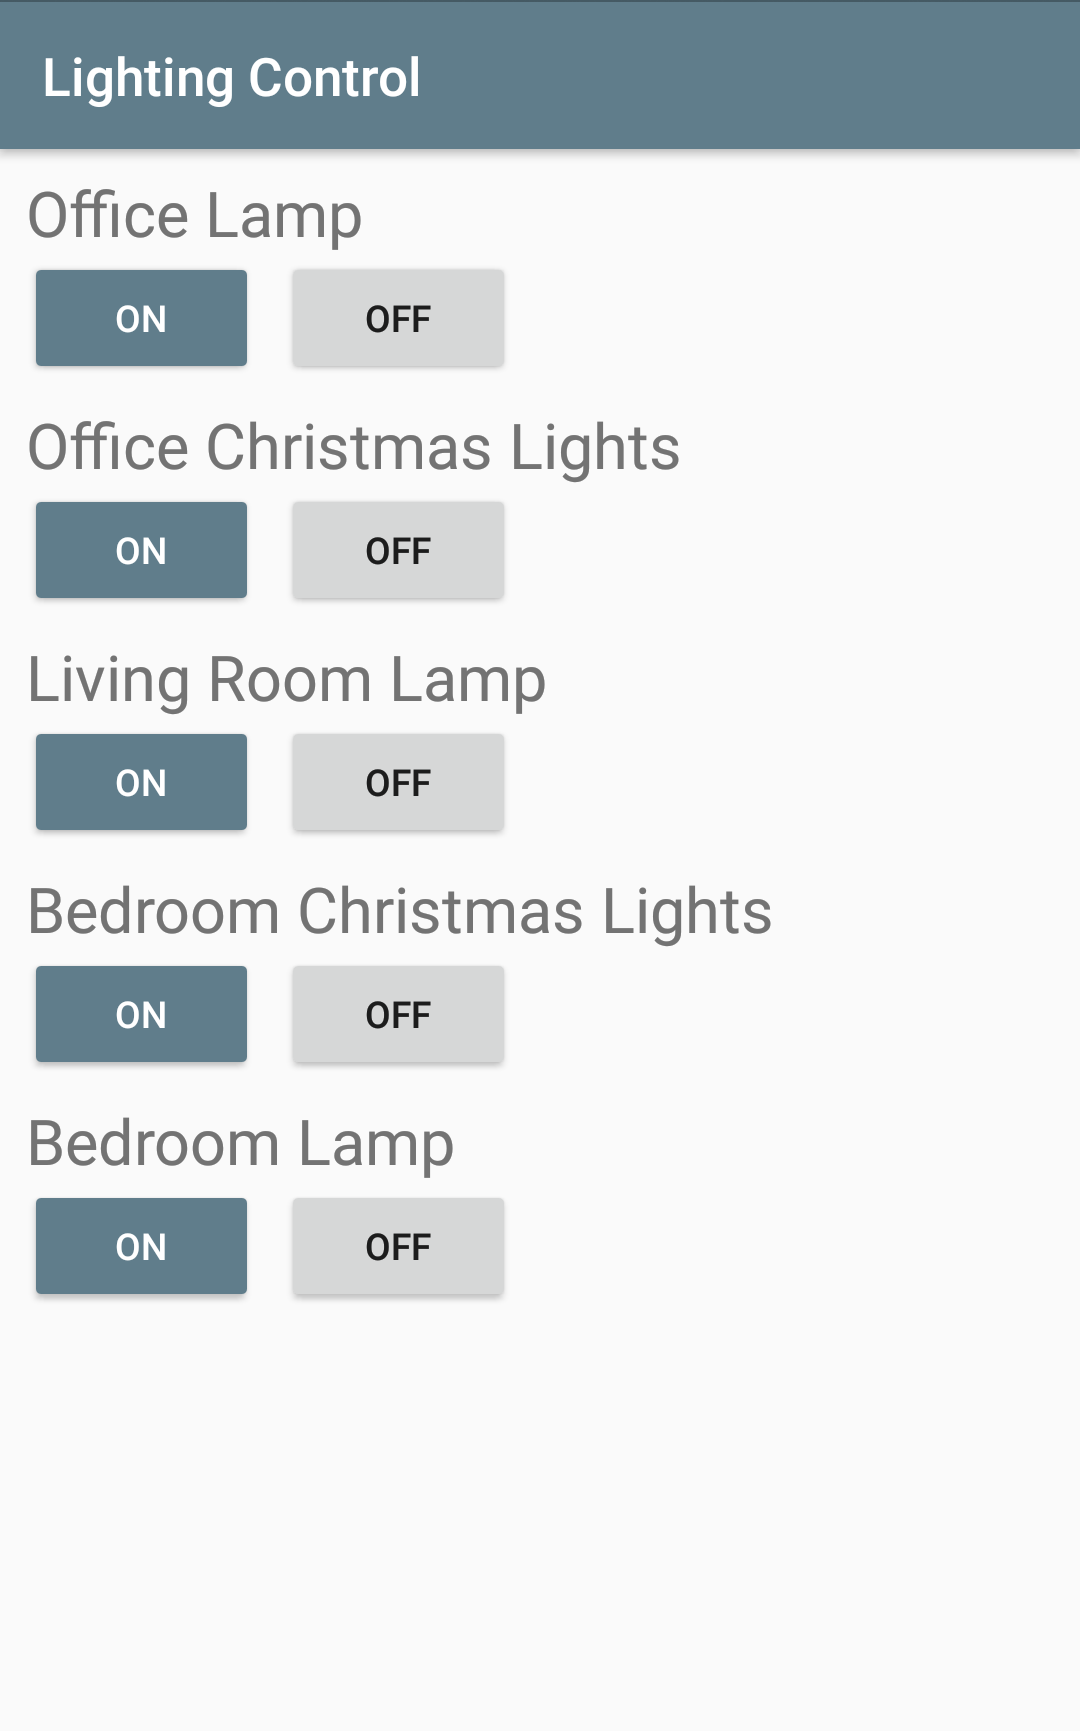
The Android app itself is pretty simple. Just a few buttons that send POST requests to the Pi’s REST API. There is also a PebbleKit receiver which listens for requests from the watch and forwards them to the Pi.
Download the App source code from here https://github.com/ianmcxa/LightingControl. Open the App in Android studio. You’ll want to change the hardcoded IP address both in MainActivity.java and in PebbleReceiver.java. Next, you’ll want to change the names of the lights in res/layout/activity_main.xml just like you did for the app.html. Once you’ve got it the way you want, connect your Android device, enable developer options, and turn on ADB. Now build and install the App. You should be able to turn the lights on and off from the app. Don’t forget to make sure you’re on the same network as the Pi!
Creating The Pebble App
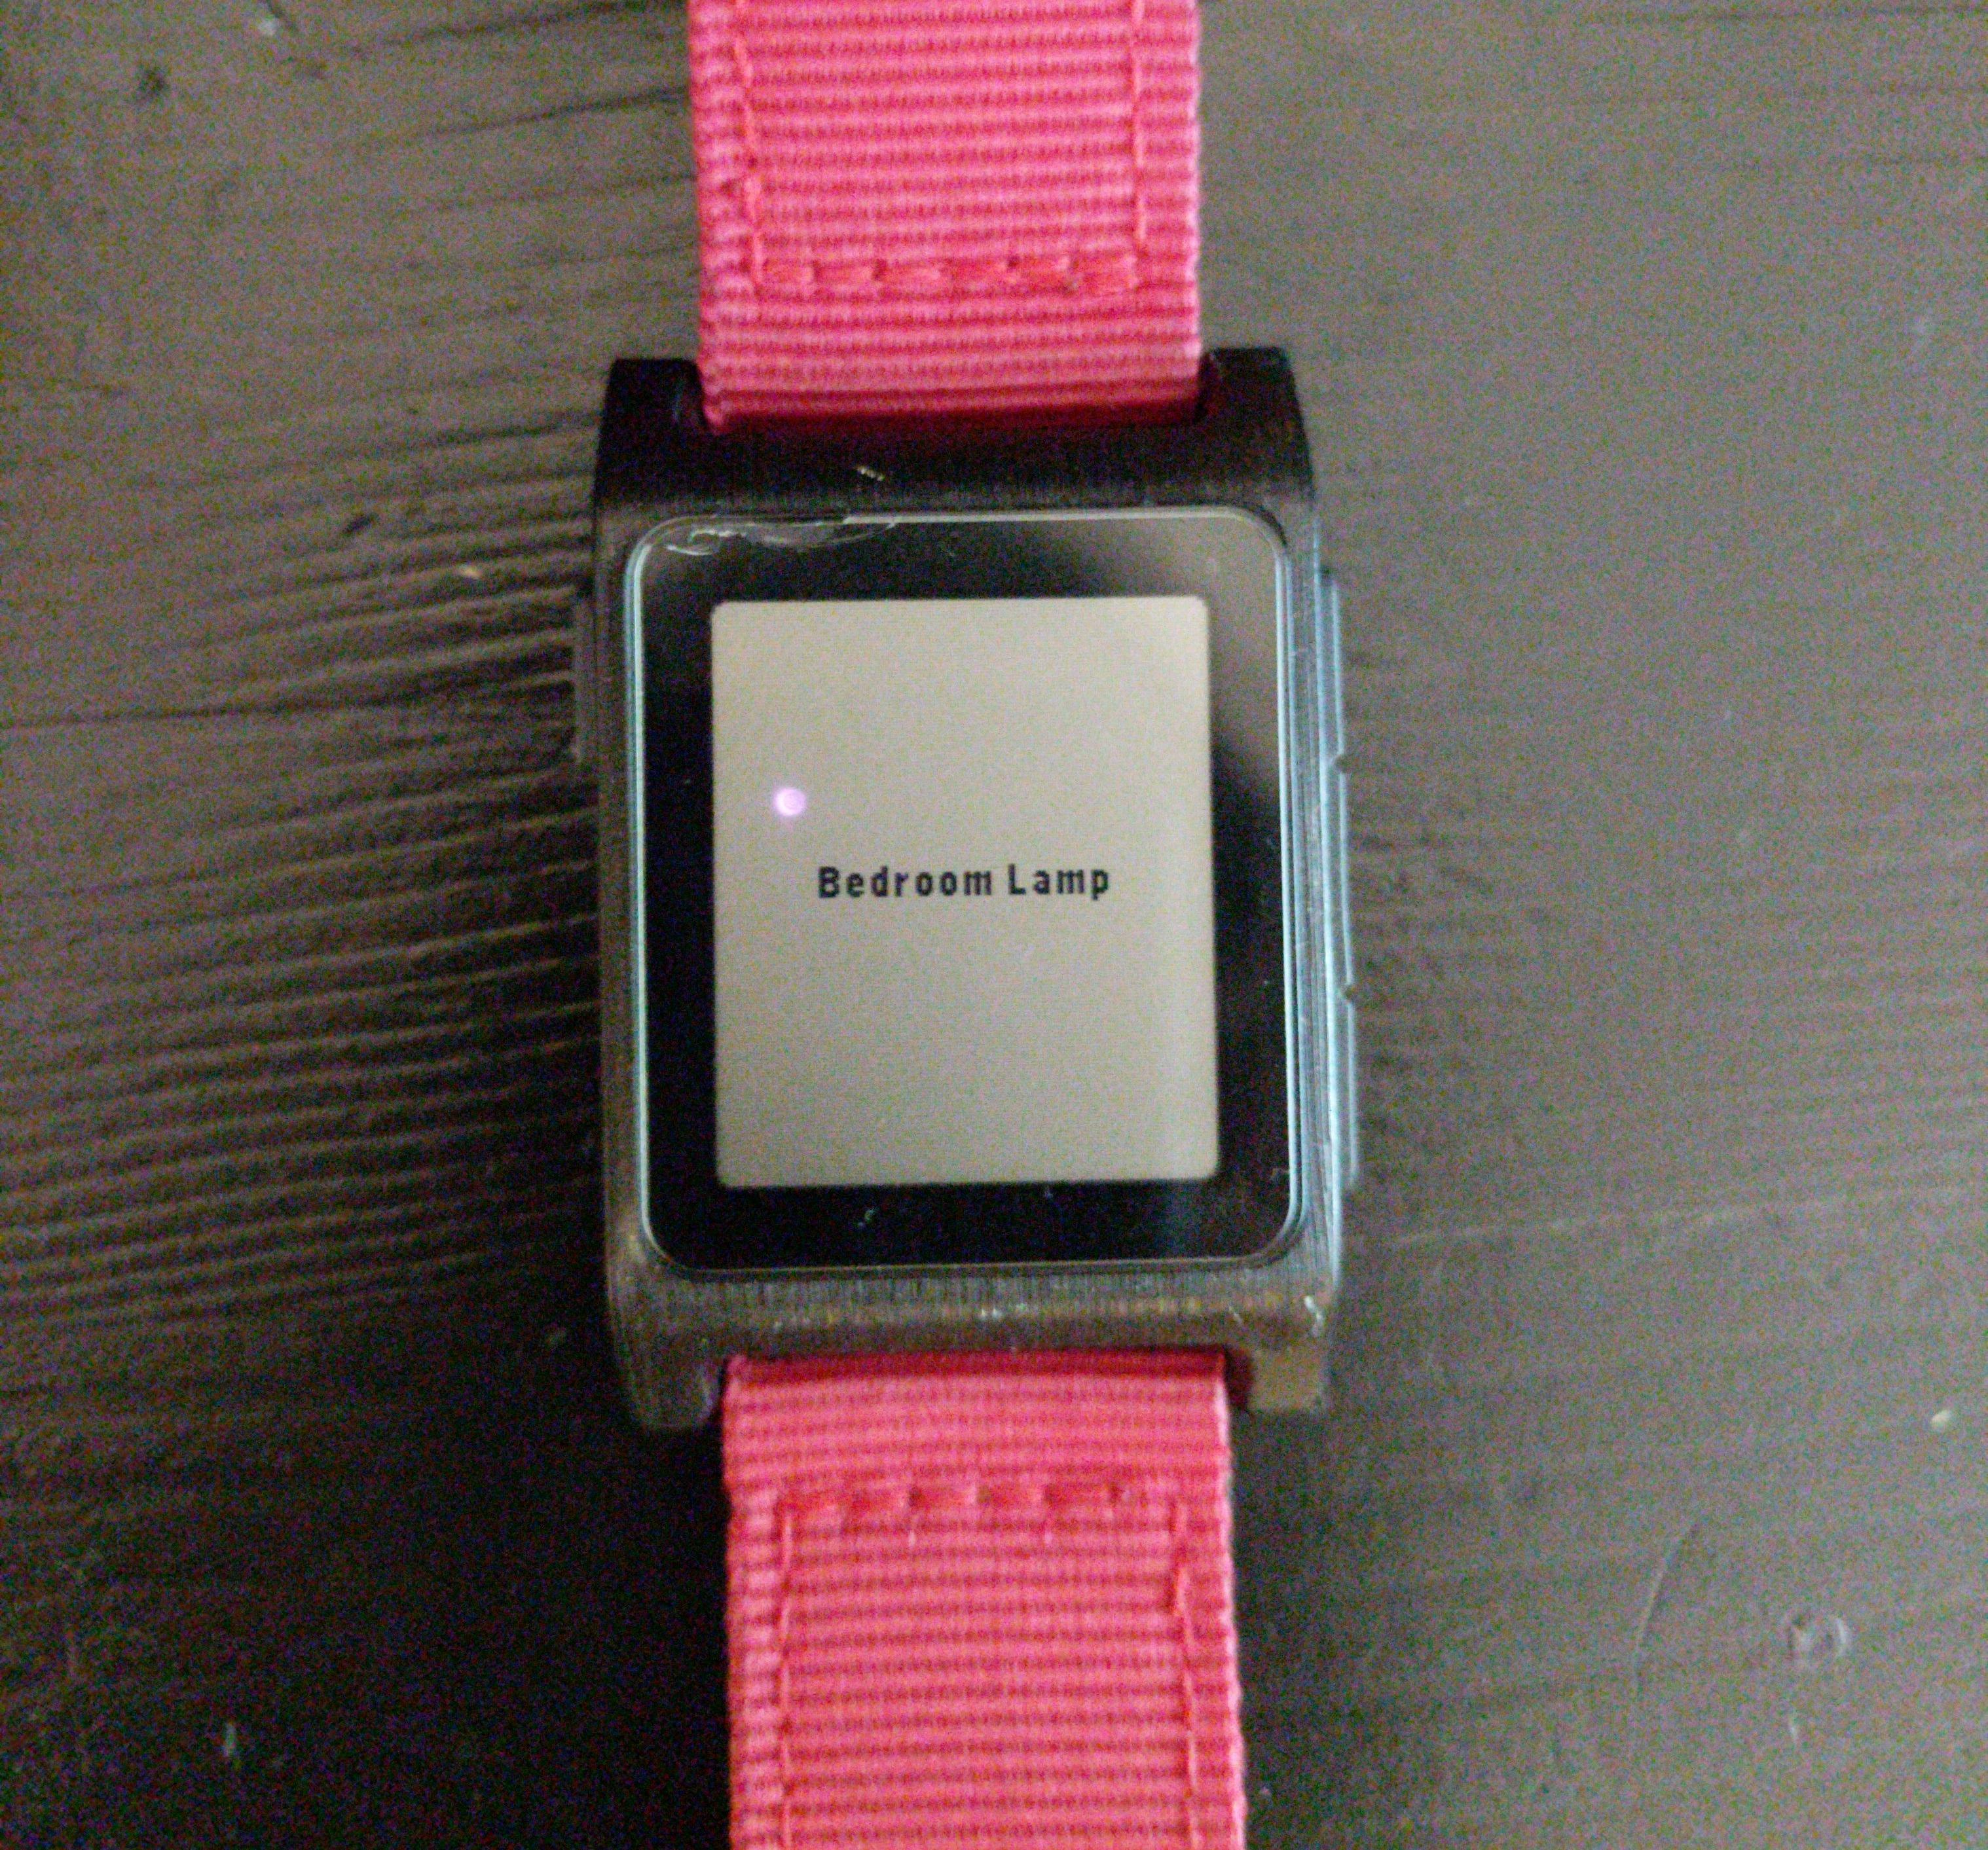
Creating the Pebble App was a bit of an interesting UX challenge. I had 3 buttons to work with (well 4 if you count the back button), and I needed to control 6 different lights in as few button presses as possible. Since I can’t know the state each light is in, I had to create a separate on and off actions. What I eventually settled on was using the top and bottom buttons for on and off respectively, and using the center button to cycle through the lights.
For the UI, I just show the currently selected light. I should eventually add an on and off button, but that can come later.
Pebble does support a Javascript API which lets you run code on the phone as part of your watch app; however, I’m using Gadgetbridge, an open source Pebble App alternative, which doesn’t support connecting to the internet from the Javascript environment. It does support the PebbleKit SDK which lets watch apps communicate with other Android apps on the phone. Since I had already created an Android app for my lights, I figured this would be the way to go.
The Pebble app sends a PebbleKit message tagged with a UUID, which Gadgetbridge forwards to the app which has registered for that UUID. This would all work well and the world would be a beautiful place except for the fact that Google has started preventing apps from broadcasting to each other.
Hacking GadgetBridge to Get Around Android’s Ban on Implicit Intents
It’s true, with Android 8 or Android Oreo Google has decided to prevent apps from broadcasting to each other. Apps can still communicate, but they must specify exactly which apps they are sending messages to. You cannot simply broadcast to any listening apps. There’s a lot of reasoning behind it. Apparently, memory constrained devices can start to thrash due to broadcasts. So, we’ll have to work around this.
My solution, which is definitely not ideal, is to fork Gadgetbridge and send the PebbleKit Intents directly to my lighting control app. The fix was actually pretty simple. In the PebbleKitSupport.java file, I changed the implicit broadcast intent to an explicit one by setting the Intent to go directly to my app lighting app org.mcxa.lightingcontrol.
I think a better solution long term may be to add a menu to Gadgetbridge that allows a user to specify which apps PebbleKit Intents should be sent to, but for now my solution works.
Setting It All Up
You can download the precompiled version here or you can build from source https://github.com/ianmcxa/gadgetbridge.
The pebble watch app is in the pebble folder of the lights repo. To modify it for your own system, you’ll need the pebble SDK. The official pebble servers have been shut down, but the rebbel.io folks have a mirror at https://developer.rebble.io/developer.pebble.com/sdk/download/index.html.
If you’re using a different Pebble model than the Pebble 2, you’ll want to modify the package.json file targetPlatforms array with the code name of your watch. Next, modify src/c/lights.c. Change the light_codes array to match your configuration. The array is formatted as {light name, light index} with the order of the array determining the order in which the center button iterates through the lights. I like to keep the lights I use the most close to the top of the array so that it takes less button presses to get to them.
At this point, you should be able to run pebble build and get a pbw file. The pbw file is a pebble watch app bundle. You can copy it over to your Android device and install it with Gadgetbridge. Launch the app and see if you can turn your lights on and off.
Bonus lctl
I also wrote a simple little low level CLI for communicating with the Pi. It’s very simple and just makes API calls. I wrote it in Nim programming language which is trying to be a sort of Python like language that compiles to C. Neat concept.
Conclusion
It’s pretty rad to be able to push buttons on my watch and have my lights turn on and off. It’s a lot more intuitive than using my phone, especially since I’ve got a shortcut setup to launch the pebble app. I can turn light on and off without even looking at my watch since I’ve memorized the button patterns.
I do feel like I’m abusing the RF spectrum a bit since to turn a light on or off, a Bluetooth packet goes from the watch to the phone. The phone then sets up a TCP connection to the Pi and forwards the request to the REST api over Wifi. Finally, the Pi sends the code to the light. I wish I could get the pebble to send packets directly to the Pi, but unfortunately there doesn’t seem to be a way to connect the two. Still though, I only have about 1 to 2 seconds of latency between pushing the button and having the light cut on.
This has been one of my more ambitious projects. I started with just the webapp, and then added the Android app and Pebble app a little later. I’ve touched a whole bunch of different languages and frameworks, Golang, Javascript, Java/Android, Nim and C. It’s been fun.